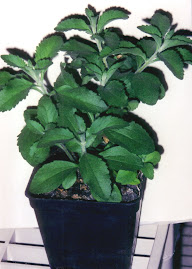
If you are a more advanced gardener, you might want to try your hand at propagating your own Stevia plants from cuttings. Here’s what you’ll need:
· A mother plant, potted or in the garden, from which to take cuttings
· Fluorescent shop light (if indoors)
· Coarse horticultural vermiculite or other coarse medium
· Small pots or cell packs with bottom holes (if indoors)
· Solid dish or tray for bottom watering (if indoors)
· Container with clear cover for humidity (optional)
· Drip hose (if outdoors)
· Sharp knife or razor
Stems root easily in late winter or spring when two key conditions are met. First, at least 14 hours of fluorescent or natural light per day seems to encourage quick rooting. Secondly, the rooting medium should be coarse horticultural vermiculite, perlite, or another coarse potting material. Use pots or cell packs with holes in the bottom and water from below as needed to maintain a constantly moist medium. Periodic misting or a clear covering may be helpful when the air is especially dry. The clear plastic “clamshell” boxes that hold lettuce or prepared pineapple from the grocery store work well for a small number of plants (see fig. ). They come complete with clear plastic lids, forming a “mini-greenhouse." Leave lid ajar to allow some air flow. Remove cover when plants begin to grow.
The mother plant from which cuttings are taken may be one that was kept over winter, or an outside garden plant. Cuttings often root simply by inserting them into the ground near a drip hose where they will have constantly moist soil. This only works in the spring or summer when days are long.
(continued below)
Use a sharp knife or razor to make a clean, slanting cut. One long shoot can be sliced into several smaller cuttings. Each cutting should be 3–5 inches (8–13 cm) in length. Remove the larger leaves. Gently insert cuttings into the vermiculite with the end that was closer to the base of the plant pointed down into the vermiculite or soil. The end that was further from the base should be pointed up. At least two leaf buds should remain above ground (leaf buds are at the axis where older leaves attach to the stem). Lower leaf buds, with the older leaf cut off, may be buried.
After 2–4 weeks, cuttings should develop several roots, possibly poking out from the drainage holes. Throw out any cuttings that wither and die or fail to produce roots. Transplant successful cuttings to a larger pot with regular potting soil and keep as potted plants or allow to grow another 2–4 weeks before transplanting outdoors.
See Chapter 4 of Growing and Using Stevia for these additional topics:
- Caring for Stevia Cuttings
- Outdoor Propagation from Cuttings
Order your copy of Growing and Using Stevia: The Sweet Leaf from Garden to Table with 35 Recipes through one of these links:
directly from Prairie Oak Publishing
###


No comments:
Post a Comment